Passing Compliancy
Upload Export via Campus Web Services
After you have fixed all the issues found by Compliance Sheriff you're ready to report those results to the Campus Sites list through IT Self Service

This process assumes you have already exported the CSV from Compliance Sheriff. If you have not already done that, you will need to have the CSV file on your local computer to upload.
ATI Scan Upload request form

Step 1)
When you have passed your site in Compliance Sheriff and have the CSV export ready it's time to update the Campus Sites list.
The ATI Scan Upload request form will walk you through the process of getting your file(s) uploaded, processed, and then change your ATI grade to reflect the update.
You do not need to create separate upload requests for multiple sites. You can upload all your CSV result files at the same time through this form.
The first step is to press the "Upload Files" button to open the attachment dialog interface.
Attach / Upload CSV File
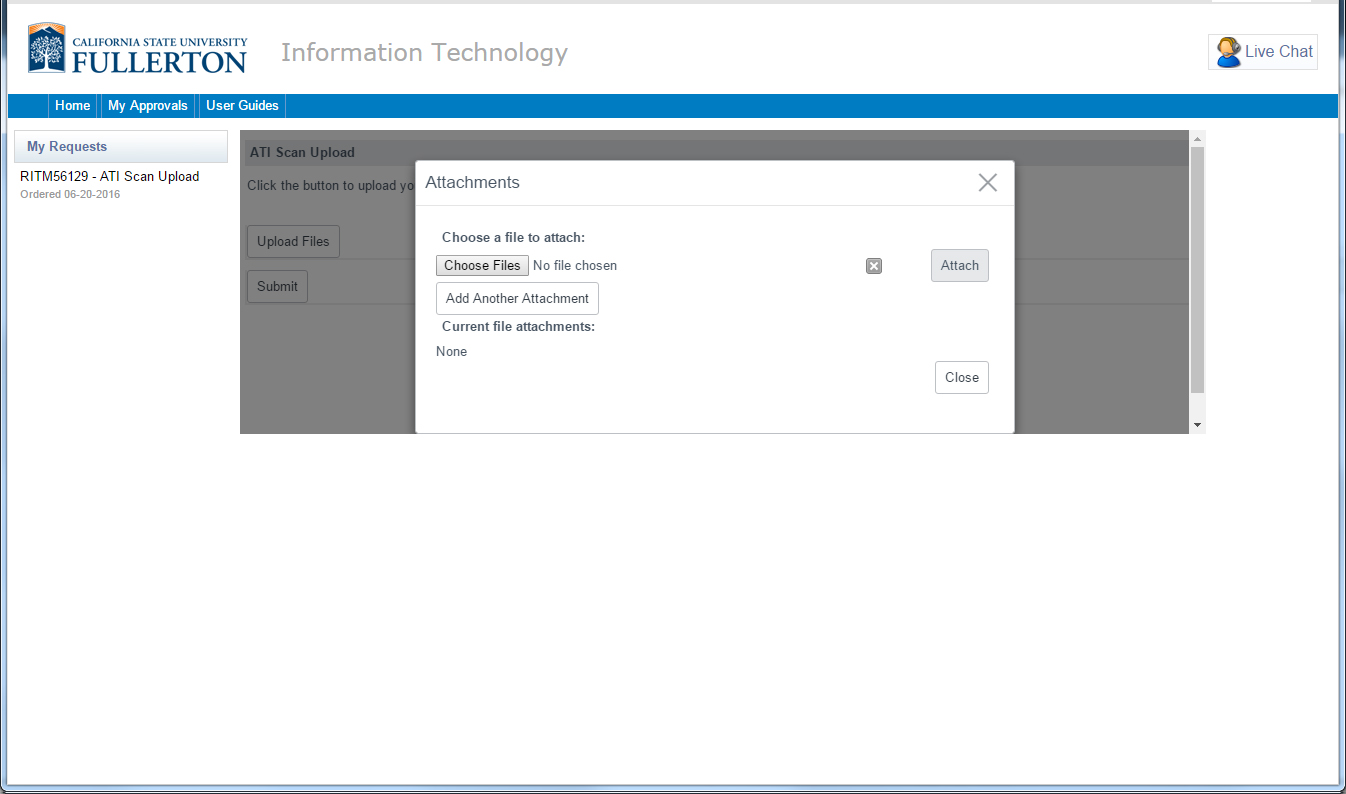
Step 2)
The attachments dialog box will open and provide you with the option to upload a document to the request.
Use the Choose Files button to upload a file from the local machine. It will open a file explorer window and allow you to pick the file from your hard drive. Find your file and upload it.
The inactive delete icon will activate as will the "Attach" button. If you are sure this file should be uploaded to the request you can use the attach button to set it, if not then use the delete icon to remove it.
You can attach multiple site exports in a single request. If you have 5 sites, you can upload all 5 CSV export files at once. All files will be listed in a queue below the choose file option. You can remove any of them if you need to using the remove button next to each file.
Review Attached Files
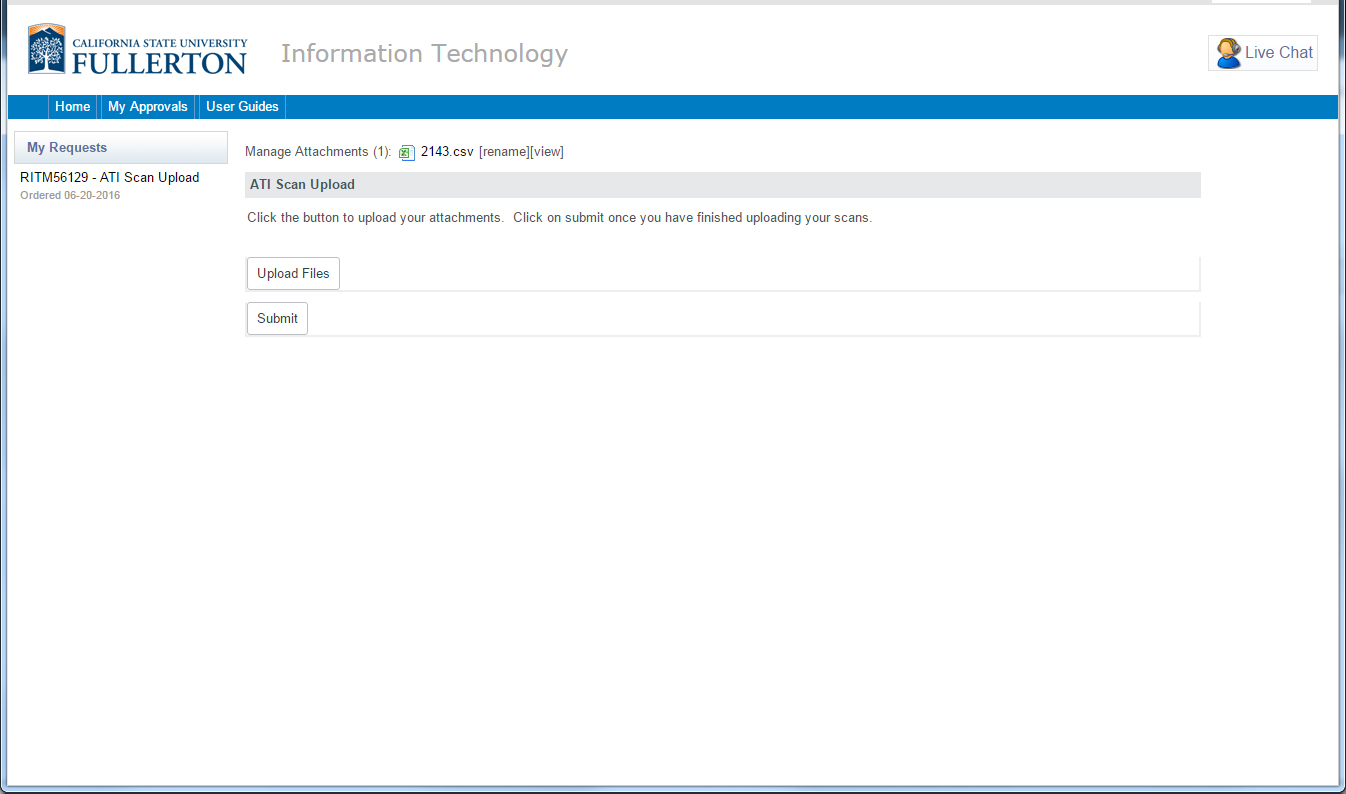
Step 3)
After you upload your file(s) and press the close button you'll be shown the ATI Scan Upload form. This time all files you are going to attach should be listed across the top of the form.
You are still given the opportunity to upload another file or change one that has been uploaded already. When you are ready use the "submit" button to add this task to your services cart.
Confirm Checkout
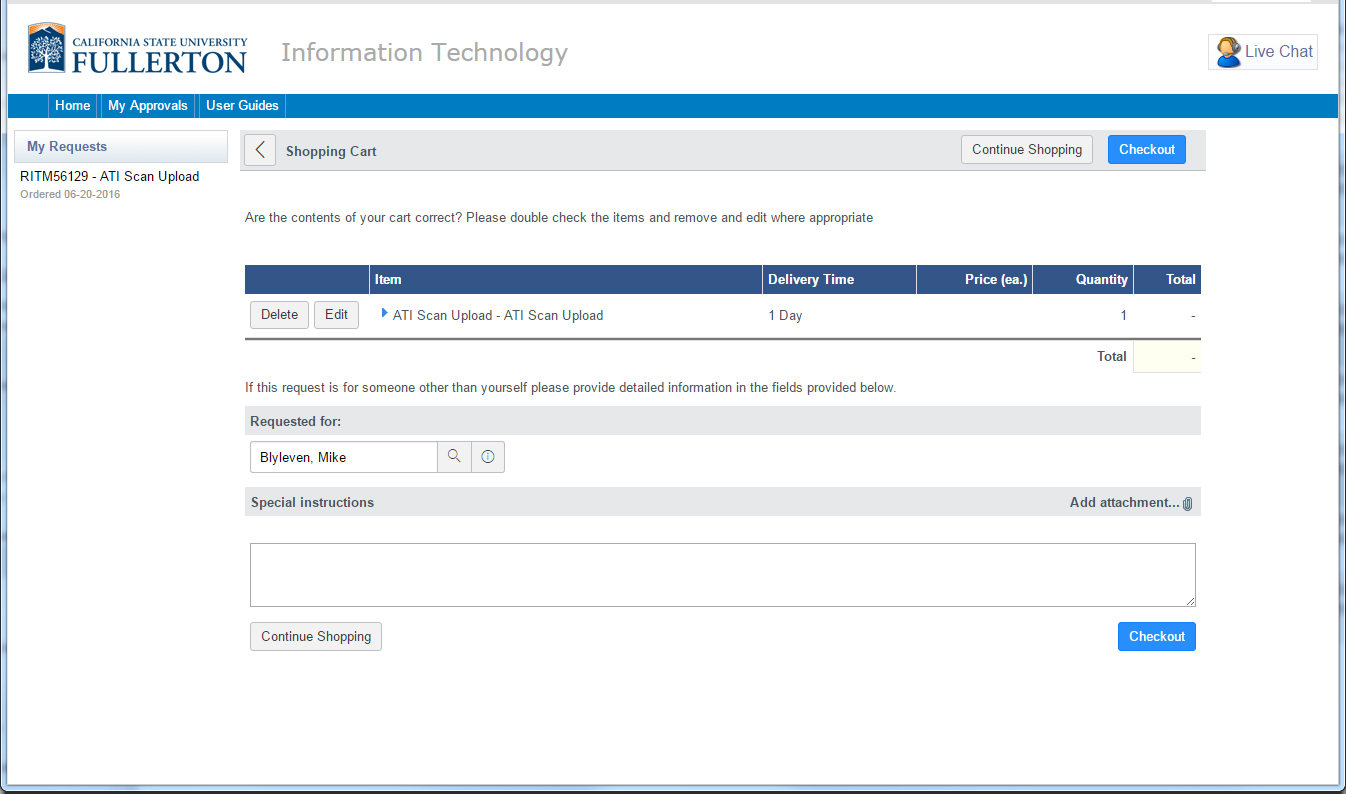
Step 4)
Web Services works on a shopping cart model where the services offered are held until you process the request. The ATI Upload may be one of many items in your cart which are activated on checkout.
Simply use the "Checkout" button to finalize the request or "Continue Shopping" to hold it until later.
The system will not update your status until you have checked out.
Upload Confirmation
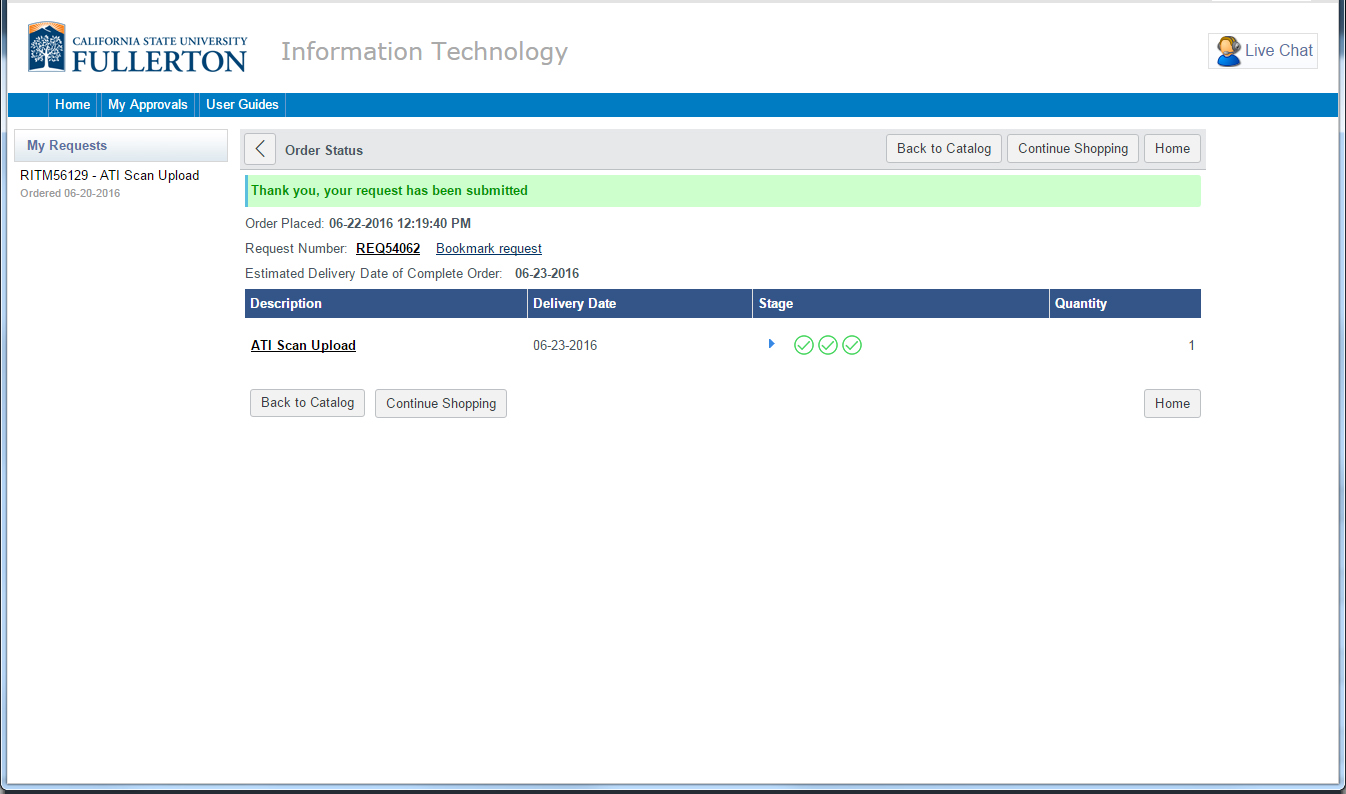


ATI Score Updated
After you finalize your checkout the system will being processing your CSV files.
The number of pages and items found will determine the speed at which your site is processed. If you have multiple files to run they will all be transcribed and your sites updated. There is no extra steps required for you to do.
During the processing time, site grades on the Campus Sites list (Pass/Fail list) will have their status changed to "Updating" this indicates that the system is still working through your upload and has not completed the task yet.
After it finishes the grade will be reset to pass or fail depending on the file uploaded. At the same time the last updated date will reflect the current date the file was uploaded. This will also reset the 90 days until the next scan is due.
If you, or anyone one on the site ownership list, had received an email notification because the site was overdue to have a scan due to it being passed 90 days, the system will automatically close that and email all parties on the ticket.